Duct Leaks in Homes: Signs, Testing, and Repair Options
Duct leaks waste up to 30% of your heating and cooling. Learn the signs, how testing works, and your repair options, from DIY sealing to professional Aeroseal.
Articles on this site may include sponsored content. If they do, it's labeled clearly — and it still has to answer a real homeowner question. Same bar as everything else here.
Duct Leaks: Signs, Testing, and Repair Options
Here’s a number that might surprise you: the U.S. Department of Energy says that in a typical home, 20 to 30 percent of the conditioned air moving through your ductwork leaks out before it ever reaches a room. That means for every dollar you spend on heating and cooling, up to thirty cents is literally vanishing into your attic, crawlspace, or basement walls.
You’re paying to cool your attic. Or heat your crawlspace. And the rooms you actually live in don’t get the air they need.
Duct leaks are one of the most common - and most overlooked - problems in residential HVAC. They cause uneven temperatures, high energy bills, poor indoor air quality, and premature equipment failure. The good news? They’re also one of the most cost-effective problems you can fix.
This guide covers everything you need to know: how to spot the signs, how professional duct testing works, and what your repair options are - from a roll of foil tape to a full duct replacement.
The Quick Answer: Do You Have Leaky Ducts?
Let’s start with the telltale signs. If any of these sound familiar, you likely have duct leaks:
- One room is always too hot or too cold while others are comfortable - classic sign of an airflow imbalance caused by leaks.
- Your energy bills seem high for the temperature you’re keeping the house at. If your bills are similar to your neighbor’s even though you keep your thermostat more conservative, leaks could be the reason.
- Dust accumulates quickly on furniture and vents. Leaky return ducts pull dusty air from your attic or crawlspace into the system and cycle it through your home. If dust and filtration are the bigger concern, compare this with indoor air quality upgrades that matter.
- Your HVAC system runs constantly but the house never feels quite right - not cold enough in summer, not warm enough in winter.
- Musty smells coming from the vents, especially after the system has been off. Leaky ducts can pull in moisture, mold spores, and odors from unconditioned spaces.
- Visible damage to ductwork - crushed sections, disconnected joints, holes, or duct tape that has dried out and failed.
You don’t need all of these. Even one or two is worth investigating. If the main symptom is one room that never feels right, the uneven room temperature guide can help you separate a duct leak from a balancing problem. Let’s walk through how to confirm what you’re dealing with.
Where Duct Leaks Usually Happen
Ductwork isn’t one solid tube - it’s a series of metal or flexible sections joined together at seams and connections. Those joints are where leaks happen most. Here’s the rogues’ gallery:
Supply Duct Connections
Where the main trunk line branches off to individual rooms - these are the most common leak points. Each connection is a potential gap that can lose air.
Return Duct Seams
Return ducts pull air back to the system. If these are leaky, you’re pulling in unconditioned air from wherever the duct runs - your attic, crawlspace, or basement. That dirty, humid, hot (or cold) air goes straight into your HVAC system and then gets distributed throughout your home. If the difference between supply and return vents is fuzzy, this supply vents vs return vents guide is a helpful companion.
Plenum Connections
The plenum is the box that connects your furnace or air handler to the main ductwork. If the seal between the plenum and the equipment is compromised, you’re losing air at the source.
Register Boots
The metal or plastic boxes behind your floor, wall, or ceiling vents are called register boots. Where they meet the drywall or subfloor, there’s almost always a gap - a notorious leak point that’s easy to miss because it’s hidden behind the vent cover.
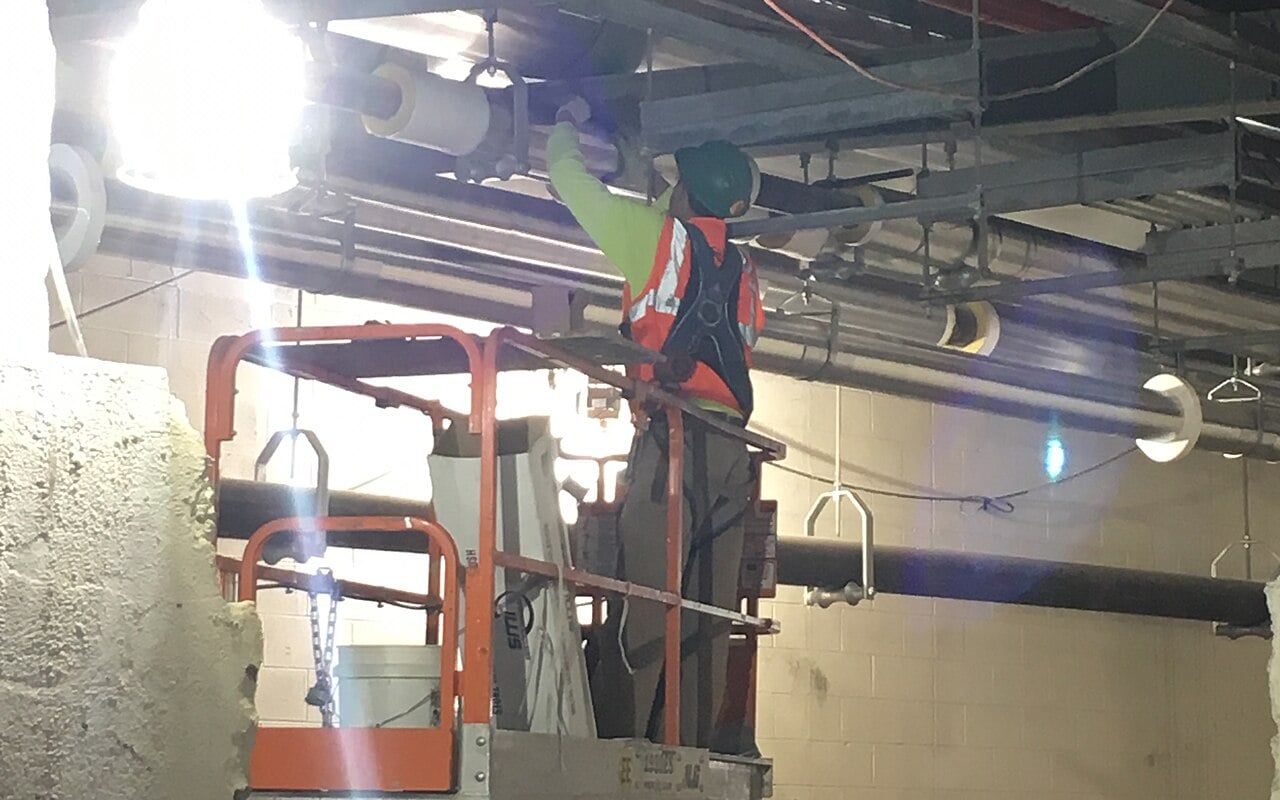
How Duct Leaks Are Tested
You can do a quick visual check for obvious problems - disconnected ducts, visible holes, crushed flex duct - but the real testing requires specialized equipment. Here’s what a professional duct leakage test looks like.
The Duct Blaster Test
A duct blaster is a calibrated fan that connects to your ductwork (usually at the main return or a supply register). All other registers are sealed temporarily. The fan pressurizes the duct system to a specific pressure, and the instrument measures how much air escapes through leaks. The result is reported in CFM (cubic feet per minute) of leakage at 25 Pascals of pressure - a standard test condition.
The test measures two things:
- Total duct leakage - all air leaking from the system, regardless of where it goes
- Leakage to outside - air leaking into unconditioned spaces like attics and crawlspaces. This is the number that really matters because it represents actual energy waste.
Blower Door with Pressure Pan
Some energy auditors use a blower door (a fan mounted in an exterior door that depressurizes the house) with a pressure pan placed over individual registers. This identifies which ducts are leaking the most by measuring pressure differences. It’s a diagnostic tool - it tells you where to focus your repair efforts.
Thermal Imaging
An infrared camera can sometimes spot duct leaks. When conditioned air escapes through a leak, it creates a temperature signature on the surface around it - say, a cold spot in the ceiling drywall above a leaky supply duct in the attic. Thermal imaging is a useful supplement to pressure testing, but it won’t catch every leak.
Static Pressure Measurement
HVAC professionals measure static pressure - the resistance to airflow in your duct system - as a diagnostic. High or low static pressure can indicate duct leaks, undersized ducts, or blockages. It’s not a direct leak test, but it’s an important clue. If your contractor mentions pressure readings, the static pressure explainer gives you the plain-English version before you approve repairs.
The Cost of Duct Leaks
Let’s put some real numbers on what leaky ducts cost you.
If your duct system is leaking 25% of your conditioned air, and your annual heating and cooling bills total $2,000, you’re wasting roughly $500 per year. That’s money that buys you nothing. If the system is also running all afternoon, compare the symptoms with the AC running constantly guide so you know whether leakage, sizing, heat load, or equipment trouble is the bigger suspect.
Over ten years, that’s $5,000 - more than the cost of professional duct sealing. And that’s not counting:
- Comfort loss. You’re paying for air you never feel.
- Equipment wear. Your HVAC system runs longer and harder to compensate for lost air, shortening its lifespan.
- Indoor air quality. Leaky return ducts pull in attic dust, insulation fibers, pollen, and sometimes rodent droppings, then distribute them through your home.
- Moisture problems. In humid climates, leaky return ducts pull in moisture that condenses inside the ductwork, promoting mold growth. If the house feels damp even while the AC runs, the humid house with AC on guide walks through the broader moisture checklist.
The bottom line: leaky ducts are costing you every month. Fixing them is one of the highest-ROI home improvements you can make.
Duct Repair Options
Now the good part - what you can do about it. Your options range from DIY to full replacement.
Option 1: DIY Sealing (Visible Leaks Only)
If your ductwork is accessible - exposed in a basement, crawlspace, or attic - you can seal visible leaks yourself. Here’s what works.
Mastic sealant is the gold standard for DIY duct sealing. It’s a thick, paintable paste that dries into a flexible, permanent seal. Apply it with a cheap paintbrush over seams, joints, and small holes. It’s messy but effective. A gallon costs about $20–30 and covers a lot of ductwork.
Foil tape (UL-181-rated) is the right tape for ducts. Do not use standard duct tape - despite the name, it’s terrible for duct sealing. The adhesive dries out and fails within a year or two. Foil tape is designed for HVAC use. It’s good for sealing joints between sections of metal duct.
Aerosol sealant cans - basically mastic in a spray can - are fine for small repairs but not cost-effective for whole-system sealing.
What’s important: you can only seal what you can reach. Ductwork running inside walls, between floors, or in tight attic corners is inaccessible for DIY. Those need professional methods.
Option 2: Professional Manual Sealing
An HVAC contractor can access and seal ductwork in most parts of your home, including crawlspaces, attics, and basements. They’ll use the same mastic and foil tape you’d use, but they know where to look and have experience finding hidden leaks.
Professional manual sealing runs $300 to $1,000 for a typical home, depending on accessibility and the extent of the leaks. It’s most effective when paired with a duct leakage test to confirm the results. Before you approve the work, use the questions to ask an HVAC contractor checklist so the quote spells out testing, sealing method, and retesting.
Option 3: Aeroseal (Aerosol-Based Duct Sealing)
Aeroseal is a different approach entirely. Instead of sealing ducts from the outside, it seals them from the inside. A contractor connects a machine to your ductwork that pumps a polymer-based aerosol sealant through the system. The sealant particles stay suspended in the air until they reach a leak - where the escaping air pulls them to the edges of the hole, building up layer by layer until the leak is sealed.
The process is computer-monitored, and the contractor can see exactly how much leakage is being sealed in real time. After sealing, a second duct test confirms the results.
Aeroseal typically costs $1,500 to $3,500 for a whole-home system. It’s more expensive than manual sealing but catches leaks that are hidden behind walls, under floors, and above ceilings that manual sealing can never reach.
The sealant is nontoxic and the process takes a few hours. The results are warranted for up to 10 years by the Aeroseal manufacturer, and properly done, the seal can last 20+ years.
Option 4: Partial or Full Duct Replacement
If your ductwork is old, deteriorated, or was installed poorly, replacement may be the best option. This is common in homes with:
- Flex duct that’s old, sagging, crushed, or kinked
- Metal duct that’s rusted through or severely damaged
- Ductwork that was never properly designed - wrong sizes, too many bends, inadequate returns
- Asbestos-containing duct insulation (common in pre-1980 homes)
Duct replacement is the most expensive option - $2,000 to $5,000 or more depending on the home’s size and ductwork complexity - but it’s also the most complete solution. You start fresh with properly sized, well-sealed, insulated ductwork designed for your specific system.
When Duct Replacement Beats Sealing
Sealing isn’t always the answer. Here’s when replacement makes more sense:
- Your ducts are more than 20 years old and showing visible deterioration. Sealing old, brittle ductwork is like patching a rusted-out muffler - you’re extending the inevitable.
- The ducts were poorly designed from the start. If your system has always had airflow issues because the ductwork is undersized, too restrictive, or missing critical return ducts, sealing won’t fix that.
- You’re replacing your HVAC equipment anyway. If your furnace or AC is at end of life, it’s a good time to evaluate the ductwork too. New, correctly sized ductwork matched to new equipment is a winning combination. If the contractor bundles duct changes into a replacement proposal, use the HVAC replacement quote guide to compare scope instead of just the final price.
- You have flex duct that’s more than 15 years old. Flex duct degrades over time - the inner liner can separate from the insulation, and the outer vapor barrier can tear. Sealing flex duct is less effective than replacing it.
Quick Answers
Q: Can I fix duct leaks myself?
You can seal visible, accessible duct leaks using mastic sealant or UL-181-rated foil tape. But many leaks are hidden inside walls, above ceilings, or under floors - those need professional equipment to detect and seal. If you have a basement or crawlspace with exposed ductwork, DIY is a great starting point. For attic ductwork or inaccessible areas, hire a pro.
Q: How much does duct leak testing cost?
A professional duct leakage test typically costs $200–$500, often including a written report of the results. Some utilities offer reduced-cost or free duct testing as part of energy efficiency programs - check with your local utility company before paying out of pocket.
Q: Is Aeroseal worth the cost?
If you have hidden duct leaks that can’t be accessed for manual sealing - which is most homes - Aeroseal is worth it. It’s expensive, but it seals 90%+ of leaks in a single visit, including leaks you’ll never reach with a brush and a bucket of mastic. The energy savings often pay for the cost in 3–5 years.
Q: Are leaky ducts a fire hazard?
Not typically from the leaks themselves, but damaged ducts can create problems. In gas furnaces, a cracked heat exchanger or disconnected flue pipe can be a safety issue - that’s different from duct leaks. Flex ducts that are crushed or kinked can restrict airflow and cause equipment overheating. If you smell exhaust gases or suspect a flue issue, that’s a safety situation - call a pro immediately.
Q: How often should ductwork be inspected?
Every 3–5 years is a reasonable interval, or whenever you notice the signs mentioned above. If you’re having a new HVAC system installed, that’s an ideal time to have the ductwork inspected and sealed - you want the new equipment pushing air through tight, properly sized ducts. For the rest of the system, this HVAC maintenance checklist shows what should be checked during a normal service visit.
Q: Does sealing ducts improve indoor air quality?
Yes - significantly. Leaky return ducts pull dust, insulation fibers, pollen, mold spores, and other contaminants from unconditioned spaces into your airstream. Sealing those returns stops that pollution at the source. Many homeowners report dramatically less dust after duct sealing. If you are trying to decide whether cleaning is part of the answer, read when duct cleaning is and is not worth it before paying for a separate service.
Q: Should I insulate my ducts after sealing?
If your ducts run through unconditioned spaces - attic, crawlspace, or basement - they should be insulated after they’re sealed. Insulating without sealing first just buries the leaks. The insulation keeps the conditioned air at the right temperature on its way to the rooms. Without it, you lose heating and cooling energy through the duct walls themselves.
Q: Will duct sealing solve my uneven room temperatures?
It will help, but it’s not guaranteed to fix every temperature imbalance. Uneven temperatures can also be caused by undersized ducts, poor duct layout, insufficient returns, or unbalanced dampers. Duct sealing addresses the leakage portion of the problem. If temperatures are still uneven after sealing, the duct system may need rebalancing or redesign.